Photo to Coloring Page — Tips for Best Results
The secret to clean photo-to-coloring-page conversions is starting with the right source image—good contrast, simple background, and tight cropping. This guide walks through specific adjustments for different ages, troubleshooting steps for photos that won't cooperate, and when to choose the
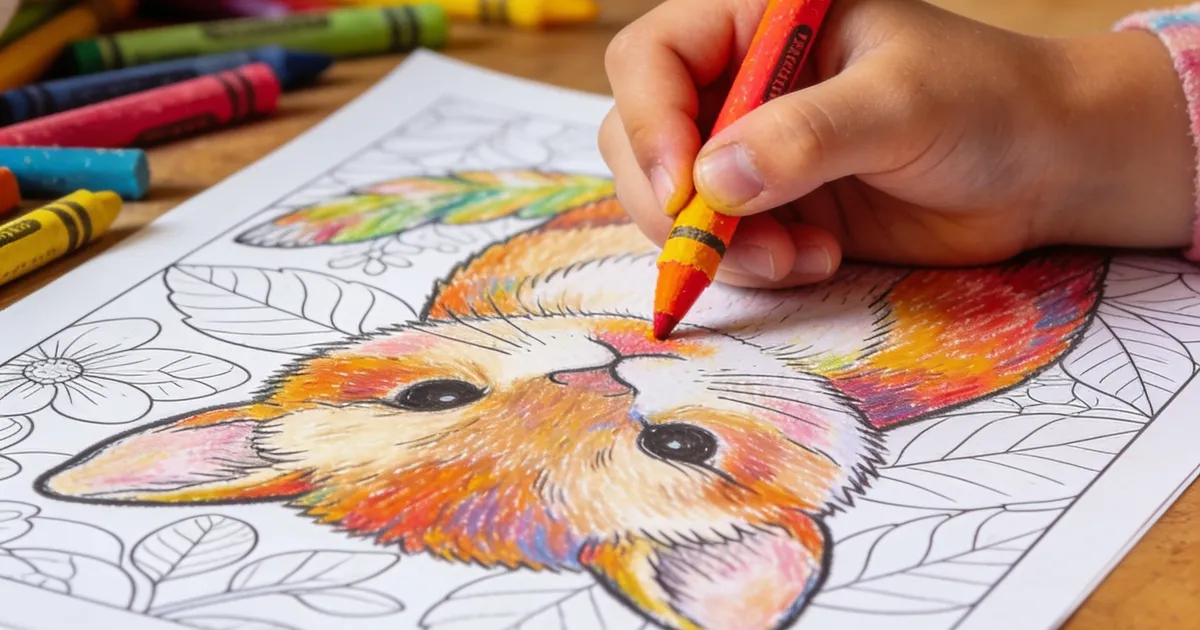

Turning a photo into a clean, colorable page comes down to choosing a picture with clear contrast between the subject and background, plus simplifying the scene before conversion. Photos with soft lighting, busy textures, or cluttered backgrounds often produce noisy, uncolorable results no matter which tool you use. Here are the specific settings, adjustments, and troubleshooting steps that consistently produce pages kids actually want to color.
What Makes a Photo Good for Converting to a Coloring Page?
A good source photo has one clear subject on a plain or out-of-focus background with strong differences between light and dark areas. Think of a child sitting on grass against a blue sky, or a pet lying on a solid-colored blanket.
Avoid photos where the subject blends into similarly-colored surroundings. A brown dog against a brown couch converts into a single blob of gray. The AI needs edges to trace, and edges only appear where colors shift abruptly.
Before you upload anything, crop in tight on your subject. Every unnecessary object in the frame—chairs, tables, other people—becomes visual clutter that confuses the conversion. Square crop works well because it mirrors standard coloring page proportions.
Something many parents discover: photos taken in bright, indirect daylight convert far better than indoor phone pictures with flash. Flash flattens depth, removes the natural shadows that define edges, and creates harsh highlights that translate as blank white patches. If you can, step outside or move next to a large window before snapping the photo.
Why Do Some Converted Photos Look Messy?
Messy conversions happen because the AI detects every texture change as an outline-worthy edge. A brick wall behind your subject becomes thousands of tiny rectangles. Grass becomes a chaotic web of lines. Clothing patterns generate noise.
The solution is simplification before conversion. On koloring.ai, the cartoon style uses bold 2pt outlines that purposefully skip minor texture details while keeping facial features and main shapes intact. For photos with busy backgrounds, try the smooth style instead—it applies heavier smoothing that merges similar tones into flat regions.
If you're working with a truly complex photo, open any basic photo editor first. Lower the saturation completely to see it in grayscale. If the background and subject look like one gray mass, the converted page will too. Boost the contrast slightly so the subject pops, then upload that modified version.
Some parents get frustrated when their favorite candid shot won't convert well. Try this: have your child pose against a blank wall with their arms slightly away from their body. That silhouette separation makes all the difference. You can also use the turn a photo into a coloring page tool with its built-in background removal option to strip away distracting scenery before conversion.
How Do You Adjust the Outline Thickness for Different Ages?
One of the most practical photo to coloring page tips is matching the outline boldness to your child's fine motor stage. What works for a confident 8-year-old overwhelms a 3-year-old still learning to hold a crayon.
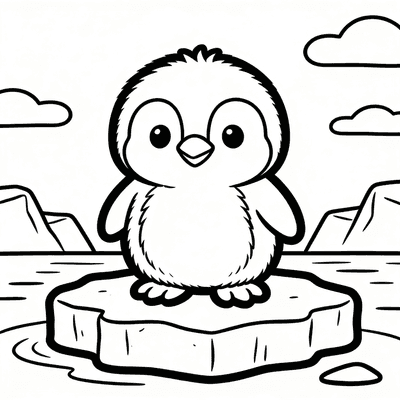
For children ages 3-5, the lines need to be thick and forgiving—at least 3pt or heavier. Thick outlines create wider "gutters" between shapes, which means a scribbling toddler is more likely to hit colorful content inside the lines rather than constantly crossing over them. This builds confidence. The Baby Penguin Standing on an Ice Block page uses exactly this approach with an easy difficulty rating.
For ages 6-9, standard 2pt outlines offer the sweet spot. Kids at this stage have better control and enjoy the detail that thinner lines reveal. For teens and adults, fine 1pt lines open up shading opportunities and more intricate sections.
When you create pages from photos, koloring.ai automatically adjusts stroke weight based on the style you select. The cartoon style defaults to bolder outlines, while the detailed style keeps them thinner. If a converted page turns out too intricate for a younger child, switch styles rather than scrapping the photo. The same family portrait can produce a toddler-friendly version and a detail-rich adult version from one upload.
What's the Step-by-Step Process to Convert a Photo Right Now?
Start by picking the photo using the guidelines above—clear subject, simple background, decent contrast. Crop it square or slightly taller than wide.
Next, open the AI coloring page creator and upload your prepared photo. The system analyzes edges, detects the subject, and generates a line-art preview in seconds. Before downloading, experiment with the style selector. Cartoon style emphasizes bold shapes and faces. Smooth style reduces texture noise. Try at least two different styles on the same photo—the differences can surprise you.
If you're converting a portrait, pay extra attention to the face. The eyes, nose, and mouth need to read clearly as separate shapes. If they merge into one dark patch, the conversion is unlikely to work for that photo. Switch to a photo with more even lighting on the face. Side-lit faces often lose half their features in conversion because shadows erase the edges.
Once you have a clean result, download it as a PDF or print directly. Many families build a small collection of personalized pages featuring the family dog, favorite park trips, or even photos of the child themselves—which kids find hilarious. For a deeper dive into the full creation workflow including drawing-to-page conversion, see How to Turn Any Photo Into a Coloring Page.
Free printable coloring pages and creative ideas, straight to your inbox.
No spam. Unsubscribe anytime.
For a different approach, turn your kid's drawing into a coloring page flips the process around. Instead of starting with a photo, your child draws something, and the AI traces it into a clean, reusable coloring sheet they can color again and again. This works beautifully for preserving artwork and sharing copies with grandparents.
Photo-to-Page vs. Drawing-to-Page: Which Works Better for Your Child?
Both methods serve different creative goals. A photo conversion captures a real memory—the day at the beach, the new puppy, a birthday moment—and turns it into a coloring activity. Kids connect emotionally with pages that feature their own world. That emotional connection often means longer, more focused coloring sessions.
A drawing conversion takes your child's existing artwork and transforms it into a crisp, colorable version. This works exceptionally well for children who love to draw but get frustrated when they can't replicate a favorite sketch. According to Scholastic, combining drawing and coloring activities strengthens fine motor skills and encourages creative thinking in complementary ways.
Try both directions. Use the photo converter for special occasions and family portraits. Use the drawing converter for your child's original creations. You might end up with a hybrid coloring book that features their original robot character on page one and a photo-derived picture of them meeting that character's "real-life" toy version on page two. For guidance on mixing these styles into a cohesive book, How to Create Personalized Coloring Books for Kids walks through the binding and arrangement process.
The Coloring Page Styles Explained — Cartoon vs Mandala vs Kawaii guide helps you decide which visual style suits different photo types. A pet portrait might shine in cartoon style, while a flower garden photo could work as a mandala-inspired design.
How Do You Fix a Photo That Won't Convert Well?
Some photos resist conversion no matter what settings you try. Before giving up on a meaningful image, run through this checklist.
First, increase the contrast in a basic photo editor. If you don't have editing software, most phones include a contrast slider in the default Photos app. Push contrast 20-30% higher than normal. This forces edges to declare themselves.
Second, try converting the photo to black and white before uploading. Some AI tools process grayscale images more cleanly because they ignore color-based edge detection errors.
Third, crop tighter. If the subject fills only a small portion of the frame, the AI distributes outline attention across everything equally. A tight crop signals what matters.
Fourth, if the background remains problematic, use the background removal feature built into the photo-to-page tool on koloring.ai. A plain white or transparent background produces the cleanest lines.
If a photo still produces unusable results after these adjustments, it may simply have lighting or texture characteristics that don't convert well. Choose a different photo of the same subject taken in better conditions. The memory matters, but so does having a page your child can actually color without frustration.
For older kids and adults who enjoy more intricate work, a slightly imperfect conversion can become a unique challenge. Some adults prefer pages with natural texture because they offer more creative coloring choices. The coloring book shop includes both crisp cartoon styles and textured designs made from converted images.
Frequently Asked Questions
Can I convert a group photo into a coloring page?
Yes, but the results depend heavily on how tightly the people are grouped. A photo where everyone stands shoulder-to-shoulder with clear separation between bodies converts reasonably well. A photo with overlapping figures, someone standing behind another person, or hands resting on shoulders often produces confusing merged shapes that don't read clearly as separate people. For best results with groups, have everyone stand a few inches apart, and shoot against a simple background.
What file format should my photo be in before uploading?
JPG and PNG files both work well for conversion. PNG files have a slight advantage if you've already removed the background, because they preserve transparency information. For photos straight from your phone camera, standard JPG files are perfectly fine. There's no need to resize to specific dimensions—the conversion tool handles scaling automatically. Just make sure the file isn't tiny; anything under 500 pixels on the shortest side may produce jagged, pixelated outlines.
How many coloring pages can I make from my photos?
There's no fixed limit—you can convert as many photos as you want using the free tools. Many families build entire personalized coloring books featuring 20-30 converted images. If you're planning a larger project, the create a coloring book tool lets you compile multiple converted pages into one organized book, complete with a custom cover. This works particularly well for vacation albums, holiday-themed collections, and first-year baby books where each month gets its own page.
Free printable coloring pages and creative ideas, straight to your inbox.
No spam. Unsubscribe anytime.